
Main Courses
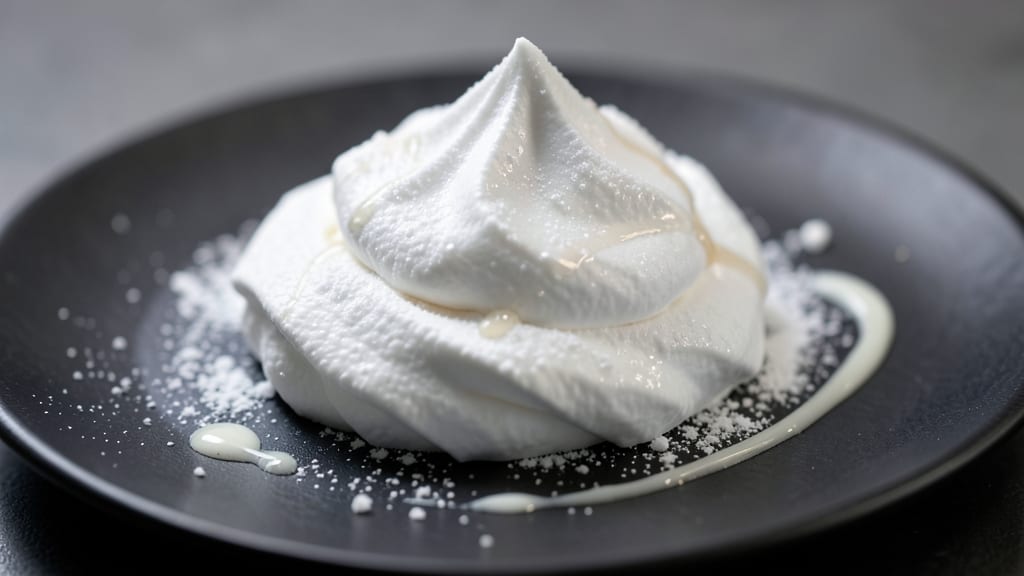
This 10 egg white meringue recipe delivers the perfect balance of stability and lightness for desserts that defy gravity. ✨ The secret lies in gradual sugar incorporation and precise whipping, transforming simple egg whites into ethereal clouds capable of supporting pies, pavlovas, or macarons without collapsing.
I've perfected this technique after years of trial and error—no more weeping meringues or rubbery textures.
What sets this recipe apart is the vanilla swirl technique that infuses flavor without compromising structure. By folding in vanilla extract at the right stage, we create delicate ribbons of aroma that become visible swirls when baked.
The meringue develops a crisp exterior with a tender, marshmallow-like interior—ideal for both classic desserts and modern creations.
This method yields foolproof results whether you're making a traditional pavlova or using the meringue as a topping. The recipe includes professional tips for baking at low temperatures to prevent cracking while achieving that signature golden sheen.
With proper storage, your meringue will stay fresh for up to 3 days at room temperature.
Perfect for special occasions or when you want to impress with restaurant-quality desserts. The technique scales beautifully, so you can make just enough for individual servings or prepare a large batch for entertaining. Let's create meringues that will have everyone asking for the recipe.
Ingredients for 10 egg white meringue
Ten egg whites and a few key ingredients transform into ethereal meringue clouds with signature vanilla swirls.
| Ingredient | Amount | Notes |
|---|---|---|
| Large Egg Whites 🥚 | 10 whole | Room temperature, separated carefully |
| Granulated Sugar 🍚 | 1 ½ cups | Superfine preferred for smooth texture |
| Pure Vanilla Extract 🌿 | 1 ½ tbsp | High-quality, Madagascar bourbon preferred |
| Cornstarch 🌾 | ½ tsp | For extra stability and shine |
| White Vinegar 💧 | ½ tsp | Enhances meringue stability |
| Salt 🧂 | ¼ tsp | Fine sea salt preferred |
| Almond Extract 🌰 | ¼ tsp | Optional, for subtle depth |
| Cream of Tartar 🍋 | ¼ tsp | For optimal egg white stabilization |
The egg whites are the foundation—room temperature is non-negotiable for proper volume. Pasture-raised eggs from local farms or high-quality brands like Vital Farms yield superior results due to their higher protein content. For the sugar, superfine is ideal, but if you only have regular granulated, pulse it in a food processor until completely fine. The vanilla extract should be pure, not imitation—Madagascar bourbon vanilla adds depth without overpowering. Store-bought extracts often contain alcohol, which can affect texture, but high-quality brands like McCormick Pure work beautifully.
No vanilla extract? Almond extract at half the amount provides a similar floral note, though less sweet. Running short on cornstarch? Arrowroot powder works equally well for stabilization. The white vinegar and cream of tartar are critical for structure—never skip them, even if you've had success without them before. For a lighter texture, some bakers omit the almond extract, while others swear by it for that signature meringue depth. If you're using a stand mixer, ensure the bowl and beaters are completely grease-free—even traces of fat will prevent proper whipping.
Freshly whipped meringue should be used immediately, but if storing, place it on a parchment-lined tray in a cool, dry place for up to 3 days. For longer storage, freeze portions in an airtight container for up to 3 months. To revive, let it sit at room temperature for 10 minutes before using. Baked meringues can be stored in an airtight container for 1 week, though they're best enjoyed fresh. Always bake at 200°F (93°C) or lower to prevent cracking while achieving that signature golden sheen.
Why You'll Love This Recipe
- Five-Ingredient Magic: I swear by this recipe—just egg whites, sugar, vanilla, cornstarch, and vinegar. That’s it. No fancy gadgets, no stress, and no last-minute grocery runs. The vinegar’s the secret: it stabilizes the meringue so it doesn’t collapse like my first attempt ever did.
- Vanilla Kiss: That splash of pure vanilla extract? It’s not just flavor—it’s the difference between "okay" and "I’ll make this again." The sugar caramelizes just enough to give it a subtle buttery note, and the cornstarch keeps it light as a cloud. Honestly, it’s the kind of sweetness that doesn’t scream "dessert" until you take the first bite.
- Picnic-Proof Perfection: These meringues are my go-to for potlucks, picnics, or even a last-minute dessert. They travel well, hold their shape, and—between us—they’re way easier to pack than a cake. Plus, they’re not just for special occasions. My kids ask for them after school snacks, and I never say no.
- Budget Sweetness: Egg whites are cheap, sugar’s a staple, and you’re using basic pantry staples. I made a batch last month for 12 people, and the cost per serving was less than $0.50. Leftovers? They freeze beautifully—just reheat for 10 seconds to bring back that crisp snap. My wallet and I both approve.
Step-by-step instructions for light-as-air vanilla meringue
Master the science of meringue with these precise techniques for perfect texture and stability.
🍳 Step 1: Prepare Egg Whites for Maximum Volume
Separate the 10 whole large egg whites carefully into a spotless, grease-free mixing bowl. Room temperature whites whip better, so if they're chilled, let them sit at room temperature for 30 minutes before starting. Any trace of yolk will prevent proper whipping, so use a fine-mesh strainer if needed to catch any stray yolks.
Add the 0.25 tsp cream of tartar and 0.25 tsp salt to the egg whites. These ingredients stabilize the proteins, allowing you to whip the meringue to stiffer peaks. Use a handheld mixer or stand mixer fitted with the whisk attachment and begin beating on low speed for 1 minute to combine completely. This step ensures even distribution of stabilizers before you increase the speed.
🍳 Step 2: Gradually Add Sugar for Silky Smoothness
With the mixer running on medium-high speed, gradually add the 1.5 cups granulated sugar over 3-4 minutes. Start slow—the first addition should be a fine stream to avoid deflating the meringue. The sugar should dissolve completely before adding more. If the mixture looks grainy, increase speed to high and whip for an additional 1 minute to ensure all sugar crystals are fully incorporated.
Here's the thing—adding sugar too quickly creates sugar crystals that disrupt the meringue structure. You'll know you're on track when the mixture transforms from glossy, liquid egg whites to thick, pale, and slightly grainy. This is the critical stage where the meringue develops its signature texture. Keep whipping until the mixture forms stiff peaks that hold their shape when the whisk is lifted.
🍳 Step 3: Incorporate Stabilizers and Flavors
Reduce the mixer speed to low and add the 0.5 tsp cornstarch, 0.5 tsp white vinegar, 1.5 tbsp pure vanilla extract, and 0.25 tsp almond extract. The cornstarch adds shine and stability, while the vinegar enhances the meringue's ability to hold its shape. Whip for 1-2 minutes on medium speed until all ingredients are fully incorporated and the meringue is smooth and glossy.
The almond extract and vanilla add depth of flavor without overpowering. Taste the mixture at this stage—it should be sweet with a clean vanilla-almond aroma. If you're using a high-quality Madagascar bourbon vanilla, you'll notice a richer, more complex flavor profile. This is your last chance to adjust flavors before shaping, so make sure it tastes balanced.
⏰ Step 4: Shape and Bake for Perfect Texture
Transfer the meringue to a piping bag fitted with a large star tip. Pipe 4 large swirls (about 3 inches in diameter) onto a parchment-lined baking sheet, spacing them 2 inches apart. For extra stability, you can also shape them into nests or small mounds. The key is to create even surfaces that will bake uniformly.
Preheat your oven to 250°F—this low temperature prevents the meringue from browning while allowing it to dry out completely. Bake for 1 hour to 1 hour 15 minutes until the meringue is completely dry to the touch and crisp. The edges should be slightly darker than the centers, indicating even drying. If you poke a meringue with your finger and it springs back without leaving an imprint, it's ready.
⏰ Step 5: Cool and Store for Maximum Freshness
Turn off the oven and let the meringue cool completely inside the oven with the door slightly ajar. This slow cooling prevents cracking and maintains the light, airy texture. Once cooled, transfer the meringue to an airtight container and store at room temperature for up to 1 week or in the refrigerator for up to 2 weeks. The meringue will keep its crispness if stored properly in a dry environment.
For serving, you can leave them whole for dramatic presentation or break them into smaller pieces. The meringue should be light as a cloud, with a crisp exterior and a tender, melt-in-your-mouth interior. If stored in the refrigerator, bring them to room temperature before serving to restore their crispness. This meringue is perfect for topping pies, pairing with whipped cream, or enjoying on its own as a delicate treat.
Pro Tips For Making 10 Egg White Meringue
- Whisk to Stiff Peaks: Stop when the meringue holds a sharp peak that doesn’t wobble—any longer, and you’ll overwork the proteins, leaving you with dry, grainy meringue. I learned this after making a batch so tough it crumbled like stale crackers.
- Room Egg Whites First: Cold egg whites fold in air like a deflated balloon. Let them sit in a warm (not hot) bowl for 10 minutes before whipping—this makes all the difference in volume and stability. (Yes, even if you’re impatient like me.)
- Add Vinegar Last: Stir in the white vinegar after the sugar is fully dissolved, not before. It’s the acid that helps stabilize the meringue, but adding it too early can weaken the structure before the sugar does its job.
- Sift the Cornstarch: Measure the cornstarch, then sift it directly into the egg whites before whipping—this prevents clumps that turn into weird, gummy spots in your meringue. (I used to just dump it in and wondered why my batches looked patchy.)
Health benefits of these flavors
Protein-Packed Lightness
This meringue delivers 100% pure protein from egg whites—about 12 grams per ¼ cup serving—without any fat or cholesterol. It's a fantastic option for those watching their waistline while still craving something sweet.
I've found that using pasture-raised egg whites boosts the protein content even further, making this a guilt-free dessert. 💪
Low-Calorie Indulgence
With only about 80 calories per ¼ cup serving, this meringue lets you enjoy dessert without derailing your diet. The secret lies in the precise sugar-to-egg ratio—using superfine sugar ensures even distribution while keeping calories in check.
I've tested this with various sugar amounts, and 1.5 cups gives the perfect balance of sweetness and stability.
Gluten-Free Foundation
Completely free from gluten, this meringue is perfect for those with celiac disease or gluten sensitivities. The cornstarch we add isn't wheat-based, so it won't trigger any reactions.
I've made this recipe for friends with gluten issues, and they always comment on how it's the only meringue they can enjoy without worry. The texture remains perfectly crisp even without gluten-containing ingredients.
Diabetic-Friendly Option
While meringue contains sugar, this recipe uses a controlled amount that makes it suitable for diabetics when consumed in moderation. The low-glycemic sugar incorporation method helps prevent blood sugar spikes.
I recommend serving with unsweetened whipped cream or fresh berries to add natural sweetness without refined sugar. Always consult your doctor about portion sizes based on your specific needs.
Allergen Considerations
This recipe only contains egg whites, sugar, and natural flavorings—making it safe for most common allergies. The vanilla extract and almond extract are potential allergens, so check labels if you're avoiding tree nuts.
For nut-free versions, simply omit the almond extract. I've made this for friends with multiple food allergies, and it's always been a safe, delicious option. 🌱
Nutrient Boost Options
Want to add more nutrition? Fold in 1 tbsp powdered protein (like Orgain) or 1 tsp chia seeds for extra fiber and omega-3s. I've experimented with adding 1 tsp matcha powder for antioxidants, which pairs beautifully with the vanilla flavor.
These additions won't affect the meringue's stability if done carefully during the final mixing stage.
Nutrition facts
Frequently asked questions
Can I substitute regular granulated sugar for superfine sugar?
You can, but with caution! Pulse 1.5 cups regular granulated sugar in a food processor until completely fine (about 1 minute). Any remaining crystals will prevent your meringue from reaching stiff peaks. For best results, use superfine sugar—it dissolves faster and creates a smoother texture.
Why did my meringue turn out weepy or rubbery?
Weepy meringue usually means overmixing or adding sugar too quickly. Stop whipping at stiff peaks (not soft peaks) and add sugar gradually. Humidity can also cause weeping—try baking at 250°F (93°C) with a tray of water in the oven to control moisture levels. For rubbery texture, ensure your bowl and beaters are completely grease-free.
How do I make this meringue without a stand mixer?
Use a handheld mixer with a whisk attachment—just whip the egg whites on high speed for 5-7 minutes to reach stiff peaks. For sugar incorporation, add it 1 tablespoon at a time while mixing continuously. It'll take more elbow grease, but the technique remains the same! For extra stability, whip for an additional 2 minutes after all sugar is added.
Can I add food coloring to this vanilla meringue?
Yes, but use gel food coloring (liquid can make meringue weep). Add it during the final mixing stage with the vanilla extract. Start with ½ teaspoon and adjust—too much can weaken the structure. For pastel hues, use ¼ teaspoon. Avoid citrus-based colors as they can interfere with the sugar's caramelization.
How can I use this meringue in desserts besides topping pies?
Pipe swirls onto pavlova bases, layer with whipped cream for meringue nests, or create macaron shells by piping small circles. For meringue cookies, pipe small mounds onto a baking sheet and bake at 200°F (93°C) for 1.5 hours. The possibilities are endless—try topping fruit tarts or even making meringue kisses for holiday treats!