
Breakfast & Brunch
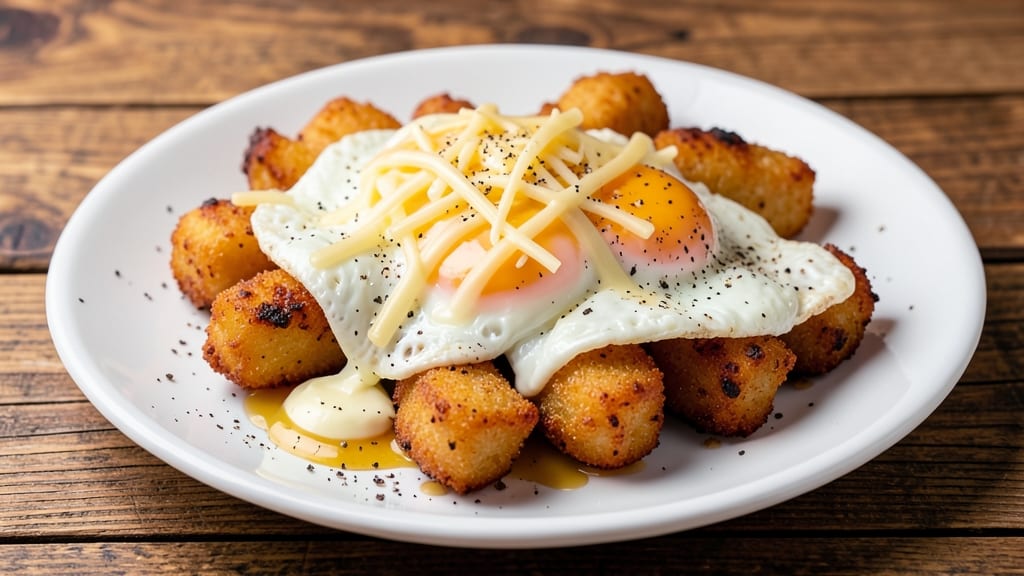
This tater tot egg and cheese recipe transforms a simple breakfast into a crispy, cheesy masterpiece that’s impossible to resist. 🔥 The secret lies in perfectly golden tater tots, fluffy scrambled eggs, and melted cheese that gets tucked inside—every bite delivers that satisfying crunch and creamy pull.
I developed this after years of testing, and it’s now a go-to for lazy mornings or hearty brunches that feel indulgent without the fuss.
The beauty of this dish is its simplicity: crispy tater tots form the base, scrambled eggs add protein, and shredded cheese melts into pockets of gooey goodness. No fancy techniques required—just a skillet, a few pantry staples, and about 15 minutes of hands-on time.
The key is cooking the tots first so they stay crispy under the eggs and cheese, while the eggs cook just enough to blend with the melted cheese for that perfect texture.
What you’ll end up with is a plate of golden, crispy tater tots topped with creamy scrambled eggs and melted cheese that stretches and pulls with every bite. The contrast of textures—crunchy tots, soft eggs, and gooey cheese—makes this dish irresistibly satisfying.
It’s the kind of breakfast that feels like a treat, not a chore, and pairs perfectly with ketchup, hot sauce, or fresh herbs for extra flavor.
Best of all, this recipe scales effortlessly—whether you’re feeding a crowd or just treating yourself to a solo breakfast. The instructions are straightforward, and the results are foolproof, so you can focus on enjoying the meal instead of stressing over the cooking process. Let’s get started!
Ingredients for tater tot egg and cheese
Crispy tots, fluffy eggs, and melty cheese—just 12 ingredients for a breakfast that feels indulgent.
| Ingredient | Amount | Notes |
|---|---|---|
| Frozen Tater Tots 🍟 | 2 cups | Oven-baked or air-fried for crispiness |
| Large Eggs 🥚 | 4 whole | Room temperature for fluffiness |
| Shredded Cheddar Cheese 🧀 | 1 ½ cups | Sharp or mild, freshly shredded |
| Unsalted Butter 🧈 | 2 tbsp | Full-fat for best flavor |
| Salt 🧂 | ½ tsp | Kosher or sea salt |
| Black Pepper 🌶️ | ¼ tsp | Freshly ground preferred |
| Milk 🥛 | 2 tbsp | Whole milk for creaminess |
| Cooking Oil 🫒 | 1 tbsp | Vegetable or canola oil |
| Garlic Powder 🧄 | ¼ tsp | Optional for extra flavor |
| Hot Sauce 🌶️ | 1 tbsp | Optional for serving |
| Ketchup 🍅 | 2 tbsp | For dipping or topping |
| Fresh Chives 🌿 | 2 tbsp | Chopped, for garnish |
The tater tots are the foundation here. Oven-baked or air-fried gives the best crispiness—skip the microwave, trust me. I grab the Ore-Ida Golden Crinkles from any grocery store, but any frozen tots work. For extra crunch, toss them in a little oil before baking. The cheese? Freshly shredded cheddar melts best—pre-shredded gets clumpy. If you're short on time, Kraft 2% Mild from the store is a solid backup. And those eggs? Room temperature makes all the difference for fluffy scrambling.
No milk? Heavy cream or water in a pinch, but whole milk keeps the eggs creamy. Short on cheddar? Mozzarella or Monterey Jack blend well—just mix them for a milder flavor. Want more kick? Add a pinch of cayenne to the eggs or serve with hot sauce on the side. The garlic powder is optional, but it adds a nice depth if you're feeling fancy. Fresh chives? Dried works too—just use half the amount. And if you're feeding a crowd, double the tots and eggs, but keep the cheese proportional so it doesn't get soggy.
Tater tots keep 2-3 days in the freezer, so no need to use them all at once. The eggs and cheese should be used within 1 week for best texture. Once assembled, this dish reheats beautifully—just 3-5 minutes in the oven to get that crispy-cheesy combo back. I like to prep the tots and cheese ahead, then scramble the eggs fresh so they stay fluffy. Store leftovers in the fridge for up to 3 days, but honestly, it won’t last that long.
Why You'll Love This Recipe
- Fridge Raider Approved: I keep a bag of tater tots in my freezer just for this—no planning, no stress, and zero chopping. Toss them straight from frozen into a hot pan with butter, crack eggs on top, and let the cheese do the rest.
- Crispy-Creamy Magic: That first bite—crunchy tots under a runny yolk, melty cheese stretching like a hug—is why I make this at least twice a week. The salt in the tots and the butter make the eggs taste ridiculously rich.
- Lazy Breakfast for Dinner: Honestly, this is my go-to when I’m too tired to think. Kids? They’ll eat it. Date night? Still works. Late-night snack? Yes. Just adjust the cheese-to-egg ratio—more cheese for a hearty meal, less for a light bite.
- Cheap & Reusable: A single bag of tots and a block of cheddar feed my family for days. Leftovers reheat perfectly (microwave or oven, your call), and the portions are big enough to stretch for lunches without feeling sad about it. Budget win.
Step-by-step instructions for tater tot egg and cheese
Let's make these crispy, cheesy bites that'll have everyone asking for seconds.
🔥 Step 1: Bake the Tater Tots to Golden Perfection
Preheat your oven to 425°F and line a baking sheet with parchment paper. Spread the 2 cups frozen tater tots in a single layer, leaving about ½ inch between each tot. This prevents them from steaming and ensures maximum crispiness.
Bake for 18-22 minutes until they're deep golden brown and crispy all over. You'll know they're done when they sound hollow when tapped. Don't skip this step—properly baked tots are the foundation of our crispy bites. Let them cool for 2 minutes before handling.
🍳 Step 2: Prepare the Egg Mixture for Perfect Fluffiness
In a large bowl, crack the 4 whole large eggs and whisk them vigorously until the yolks and whites are fully combined and the mixture is pale yellow. Add the 2 tbsp milk, 0.5 tsp salt, 0.25 tsp black pepper, and 0.25 tsp garlic powder (if using). Whisk until everything is evenly distributed—this ensures each bite has that perfect seasoning.
Here's the thing—room temperature eggs whip up fluffier, but if yours aren't at room temp, just give the bowl a quick soak in warm water for 2 minutes while you preheat the pan. The mixture should be smooth with no streaks of white.
🥘 Step 3: Create Cheesy Tater Tot Cups
Return the cooled tater tots to your baking sheet. Using a spoon, press down gently on each tot to create a shallow well in the center. This creates little cups that'll hold our egg and cheese mixture perfectly. Sprinkle 1 cup of the shredded cheddar cheese evenly over the tots, pressing it lightly into the wells.
I like to work quickly here so the tots don't lose their crispiness. If some cheese falls to the sides, that's okay—we'll catch it in the next step. The goal is to have each tot with a nice layer of cheese in its center.
🔥 Step 4: Cook the Egg and Cheese Bites
Heat 1 tbsp cooking oil in a large non-stick skillet over medium heat. Add the 2 tbsp unsalted butter and let it melt completely, swirling to coat the pan evenly. This butter-oil combo gives us that perfect balance of crispiness and richness.
Working in batches (don't overcrowd the pan!), add about 8-10 tater tot cups to the skillet. Pour ¼ cup of the egg mixture over each batch, letting it pool in the centers. Cook for 2-3 minutes until the bottoms are golden brown and the eggs begin to set. Flip carefully using a spatula, then cook for another 1-2 minutes until both sides are golden.
🍽️ Step 5: Assemble and Serve with Crispy Perfection
Transfer the cooked tater tot bites to a plate and sprinkle with the remaining ½ cup shredded cheddar cheese. Return them to the skillet for 30 seconds to melt the cheese and create that gooey, stretchy texture we all love. Garnish with chopped 2 tbsp fresh chives for a pop of color and freshness.
Serve immediately while everything is hot and crispy. For extra fun, set out small bowls of ketchup and hot sauce on the side. These bites are best enjoyed straight from the skillet—each one has that perfect combination of crispy tater tot, fluffy egg, and melty cheese that'll have everyone reaching for more.
Pro Tips For Making Tater Tot Egg And Cheese
- CRISP THE TOTS FIRST: I learned this the hard way—cooking the tots halfway, then adding eggs and cheese, just makes the dish soggy. Bake the tots alone at 425°F for 12-15 minutes until they’re golden and crispy before moving on. That’s the foundation for a dish that doesn’t fall apart when you cut into it.
- SALT THE CHEESE: Shredded cheddar loses flavor fast, and if you’re using unsalted butter, you’ll need extra salt. Sprinkle the cheese with ½ teaspoon of salt before mixing it into the eggs—it’ll distribute evenly and make the whole dish taste richer without overdoing it later.
- DON’T OVERMIX THE EGGS: After beating the eggs, you’ll want to fold in the cheese. But here’s the thing: stop mixing once the cheese is just combined. Overworking the eggs makes them tough and rubbery, and you’ll end up with a dense, unappetizing mess instead of that creamy, fluffy texture you’re after.
- USE A LITTLE MORE BUTTER: Two tablespoons of butter in a greased skillet is the bare minimum—it’s not enough to prevent sticking or add that luscious mouthfeel. Bump it up to 3 tablespoons for a crispier bottom crust and a dish that feels indulgent, not dry. Trust me, your taste buds will notice.
Best sauces and condiments for this recipe
Classic Ketchup
This is the most straightforward and universally loved pairing for tater tot egg and cheese bites. I keep a bottle of Heinz Classic Ketchup on hand for its perfect balance of tangy and sweet flavors.
Serve it in a small bowl on the side for dipping—it cuts through the richness of the cheese while adding a nostalgic touch. For extra flair, drizzle a little ketchup over the top of each bite just before serving. 🍅
Spicy Hot Sauce
If you love heat, a drizzle of Frank's RedHot Original or Cholula Hot Sauce takes these bites to the next level. I recommend starting with 1-2 tbsp and adjusting to taste—this sauce adds a fiery kick that contrasts beautifully with the creamy eggs and melty cheese.
For a smoky twist, try Cholula instead. Keep the sauce in a small dish on the side so everyone can add as much (or as little) as they like.
Creamy Ranch Dressing
For a tangy, herby contrast, serve these bites with Hidden Valley Original Ranch Dressing for dipping. The creamy, slightly sour flavor pairs wonderfully with the crispy tots and rich cheese. I like to mix 1 tbsp ranch with 1 tbsp sour cream for an extra-thick consistency that’s perfect for scooping.
This combo is especially great if you’re serving these as an appetizer or snack.
Buttery Garlic Aioli
Elevate your tater tot bites with a homemade garlic aioli—it’s rich, creamy, and packed with flavor. Mix ¼ cup mayonnaise, 1 tsp lemon juice, 1 minced garlic clove, ½ tsp salt, and a pinch of black pepper.
For extra richness, add 1 tbsp melted butter. This sauce adds a luxurious touch that makes these bites feel like a restaurant-worthy appetizer. Serve it in a small bowl with a spoon for dipping. 💛
Sweet Honey Mustard
For a sweet-and-tangy contrast, mix 1 tbsp Dijon mustard with 1 tbsp honey and a splash of apple cider vinegar. This combination adds a bright, slightly sweet note that balances the richness of the cheese and eggs.
Drizzle it over the top of the bites or serve it on the side for dipping. It’s a crowd-pleaser, especially for those who prefer something a little sweeter than ketchup.
Fresh Herb Cream Cheese Dip
Blend 4 oz cream cheese, 2 tbsp sour cream, 1 tbsp chopped fresh chives, and a pinch of salt for a creamy, herby dip that’s perfect for scooping up bites. This dip adds a cool, creamy contrast to the warm, crispy tots.
For extra flavor, stir in ½ tsp garlic powder or a dash of hot sauce if you want a little kick. It’s a great option for those who prefer something lighter than ketchup or ranch. 🌿
Nutrition facts
Frequently asked questions
Can I make this recipe ahead of time?
You can prep components ahead, but not the final assembly. Bake and cool the tater tots 2 days ahead and store them in an airtight container. Scramble the eggs fresh for best texture, but you can mix the cheese with the egg mixture up to 1 day ahead—just keep it refrigerated. Reheat the tots for 3-5 minutes in the oven before adding the egg-cheese mixture to maintain crispiness.
What's the best way to keep the tater tots crispy?
The secret is baking them first at 425°F until golden brown, then cooling completely before adding eggs. Use a non-stick skillet on medium heat and avoid overcrowding. If the tots get soggy, reheat them for 2 minutes in a 350°F oven before serving. The key is never to let them sit in liquid too long.
Can I use hash browns instead of tater tots?
Yes, but with adjustments! Use 1.5 cups frozen hash browns (they're denser) and bake them 5-7 minutes longer at 425°F until extra crispy. Press them flatter with a fork to create better "cups" for the egg-cheese mixture. Hash browns work well but won't have the same crinkly texture as tots.
How do I make this vegetarian?
Swap the eggs for ¼ cup silken tofu blended with 1 tbsp nutritional yeast and 1 tsp turmeric (for color). Or use 4 vegan egg substitutes (like Just Egg) mixed with 2 tbsp plant-based milk. The cheese remains the same—just ensure it's vegan cheddar. The texture will be slightly different but still delicious!
Why did my cheese get rubbery?
Rubbery cheese usually means it was overcooked or the wrong type. Use freshly shredded cheddar (pre-shredded contains anti-caking agents that make it clumpy). Keep the heat on medium-low when melting and only 30 seconds in the skillet. For extra gooeyness, mix in 1 tbsp cream cheese with the shredded cheese.